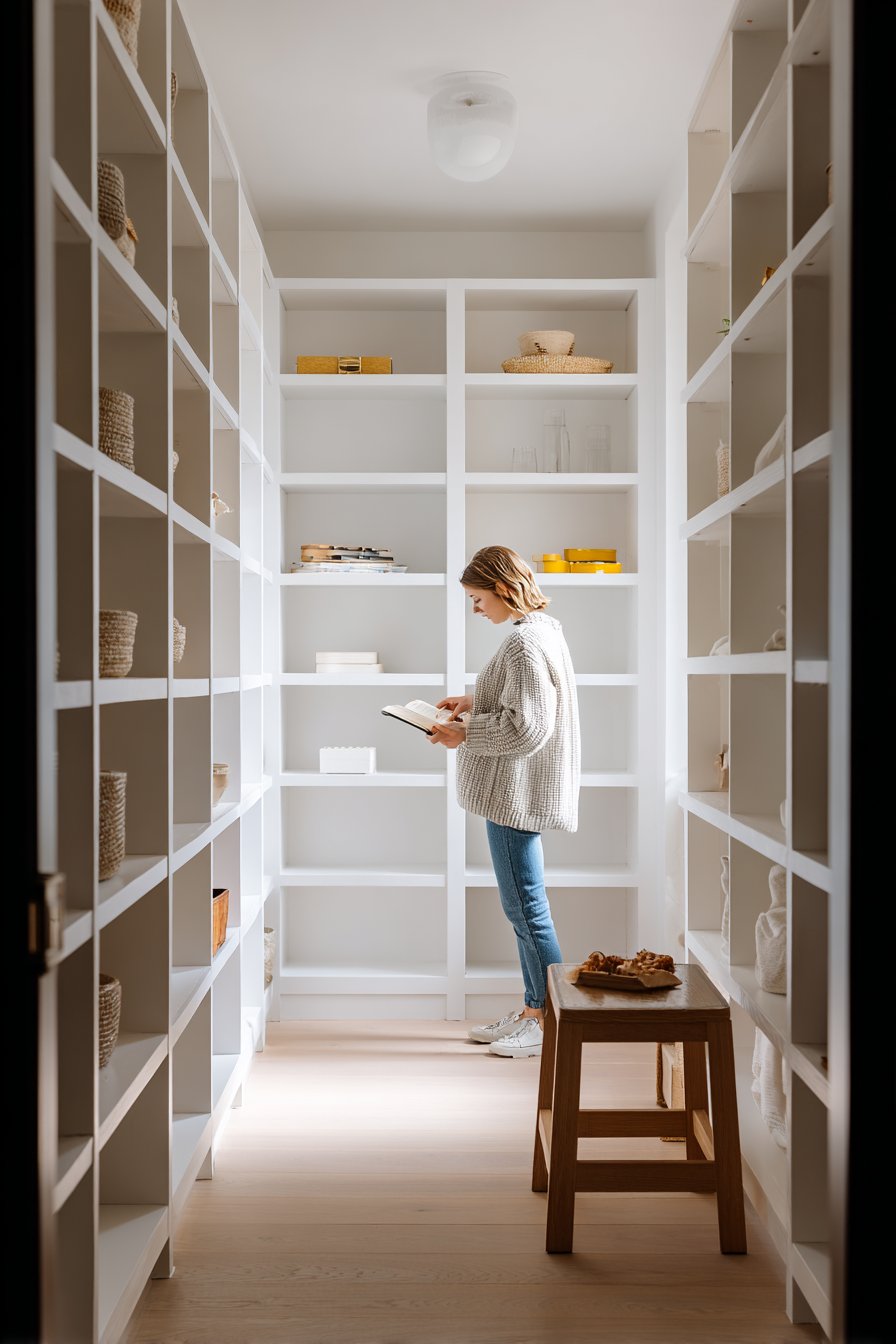
A well-organized walk-in pantry transforms chaotic food storage into a streamlined culinary command center. This dedicated space can revolutionize your daily routine, making meal preparation faster and grocery shopping more efficient. Whether you’re working with a spacious pantry or a modest closet conversion, proper organization creates a functional system that saves time and reduces waste.
The key to a successful pantry lies in thoughtful planning and strategic design choices. By implementing professional organizing principles, you can create a space that’s both beautiful and practical. This guide will walk you through essential steps to transform your empty pantry into an organized haven. From initial planning to final styling touches, each section provides actionable strategies that maximize storage potential while maintaining easy access to your kitchen essentials.
1. Assess Your Space and Create a Plan
Before purchasing a single container or shelf, take time to measure your pantry dimensions accurately. Understanding the vertical and horizontal space available allows you to make informed decisions about shelving configurations and storage solutions. Walk into your empty pantry with a tape measure, notepad, and clear vision of what you need to store.
Consider the types of items you’ll organize, from bulky cereal boxes to small spice jars. Categorizing your inventory helps determine how much space each category requires. Think about your shopping habits, family size, and cooking frequency. These factors influence whether you need more room for bulk storage or prefer smaller, frequently rotated stock.
Create zones for different item categories before installing any organizational systems. Your plan should account for high-traffic items at eye level and less-used items on upper or lower shelves. Strategic placement reduces bending and stretching during daily use.
- Measure wall heights, widths, and depths at multiple points
- Document any electrical outlets, switches, or architectural features
- List all food categories and kitchen supplies needing storage
- Sketch a basic floor plan showing intended zones
- Calculate approximate quantities for each category
- Consider future storage needs as family grows
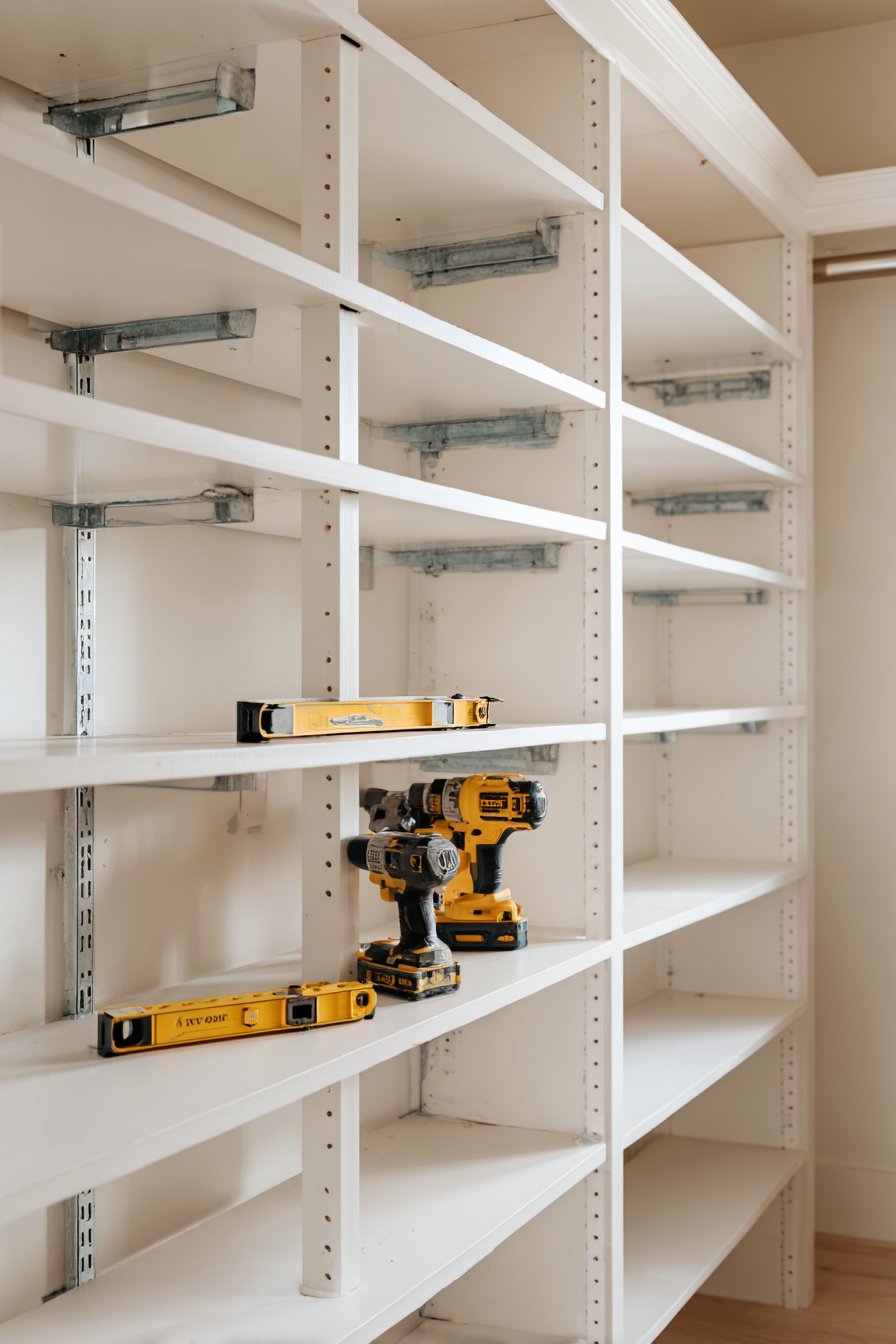
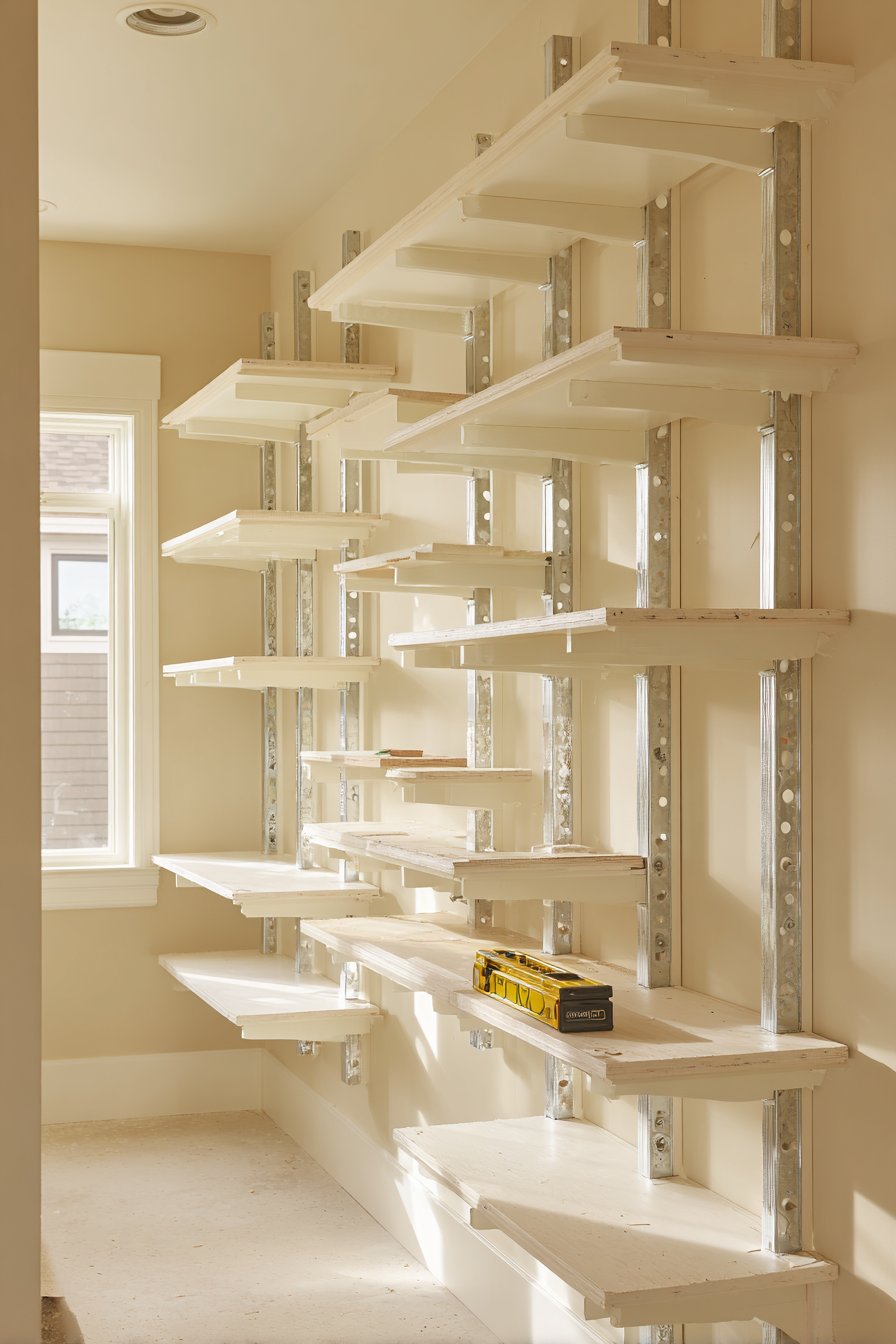
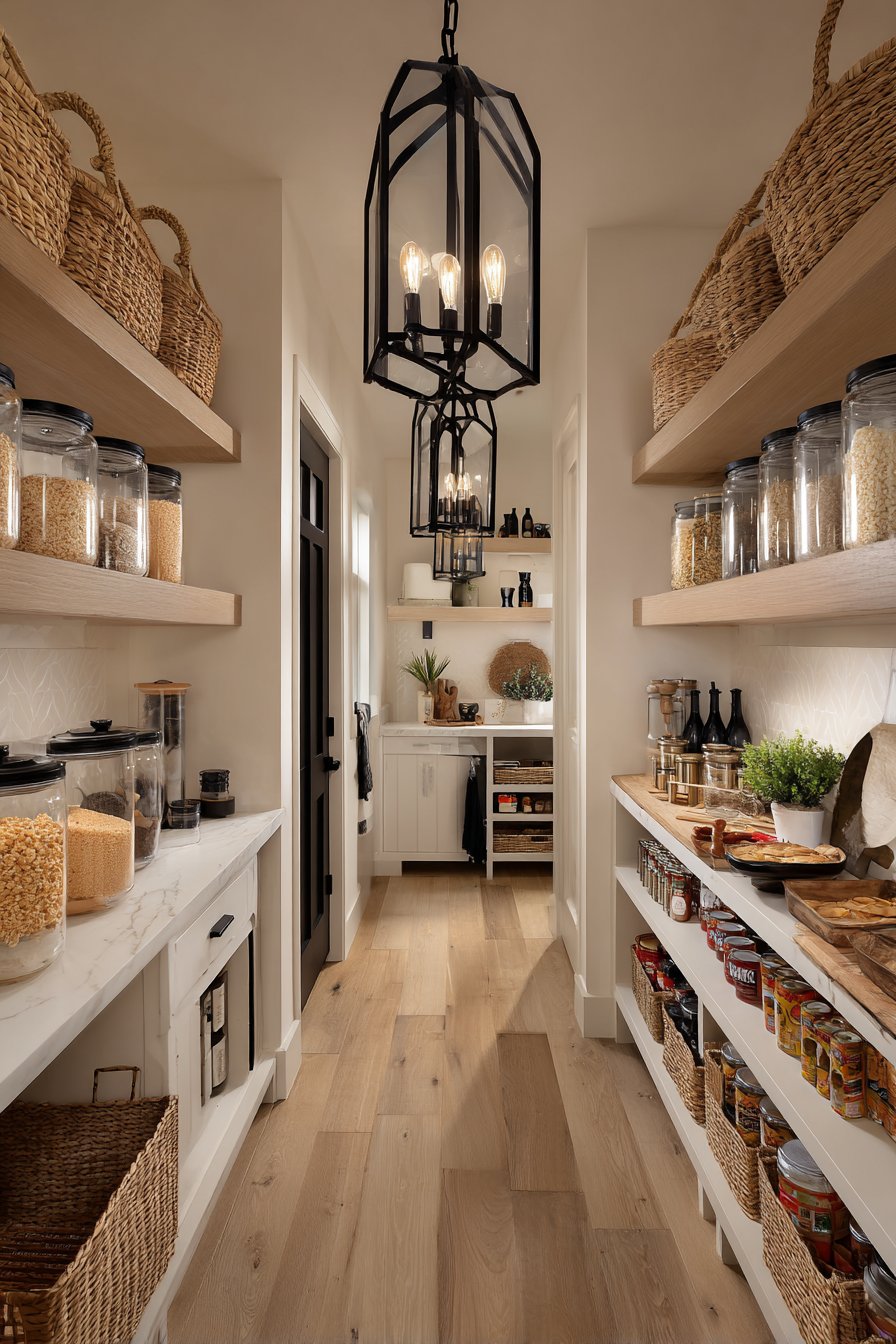
2. Install Proper Shelving Systems
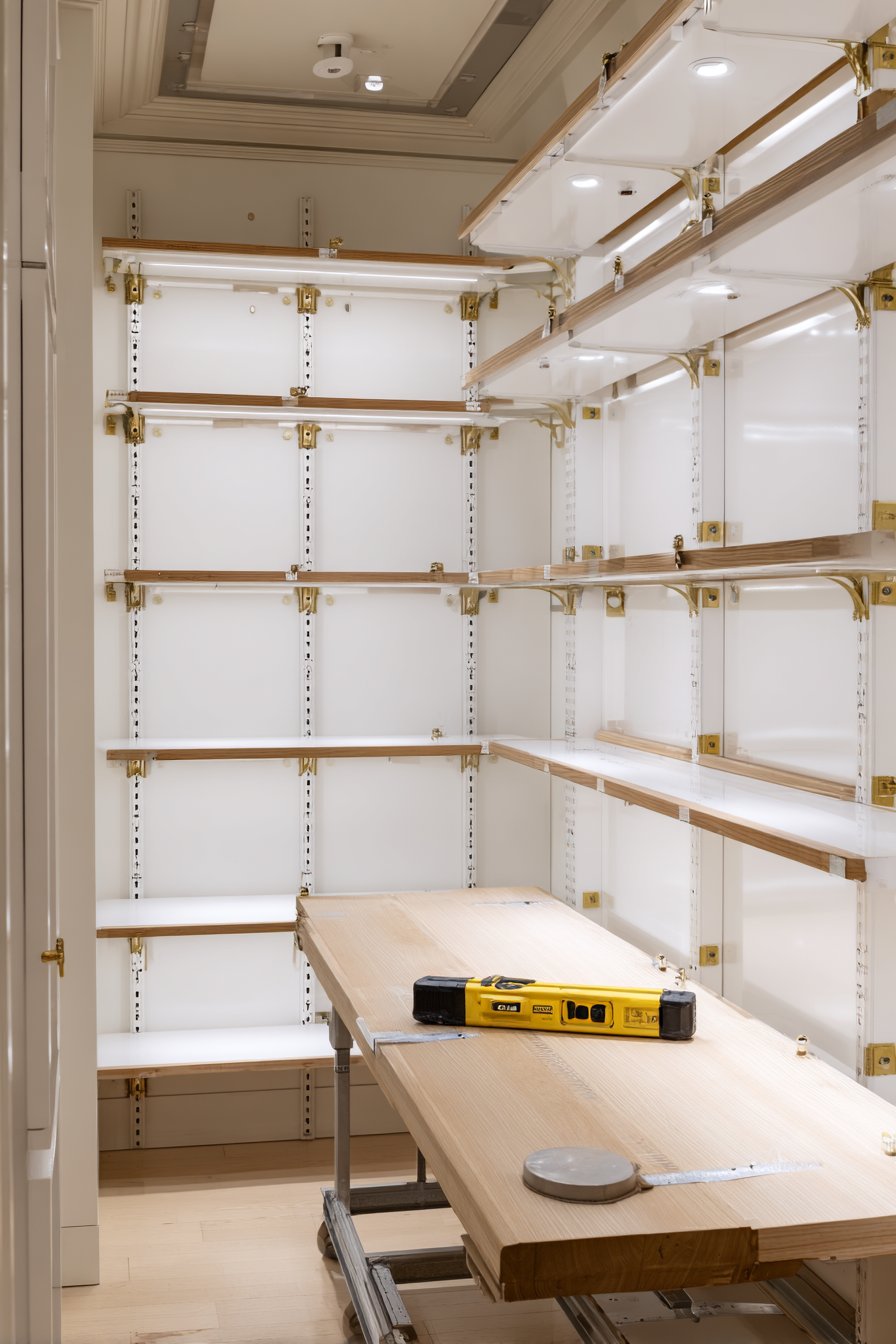
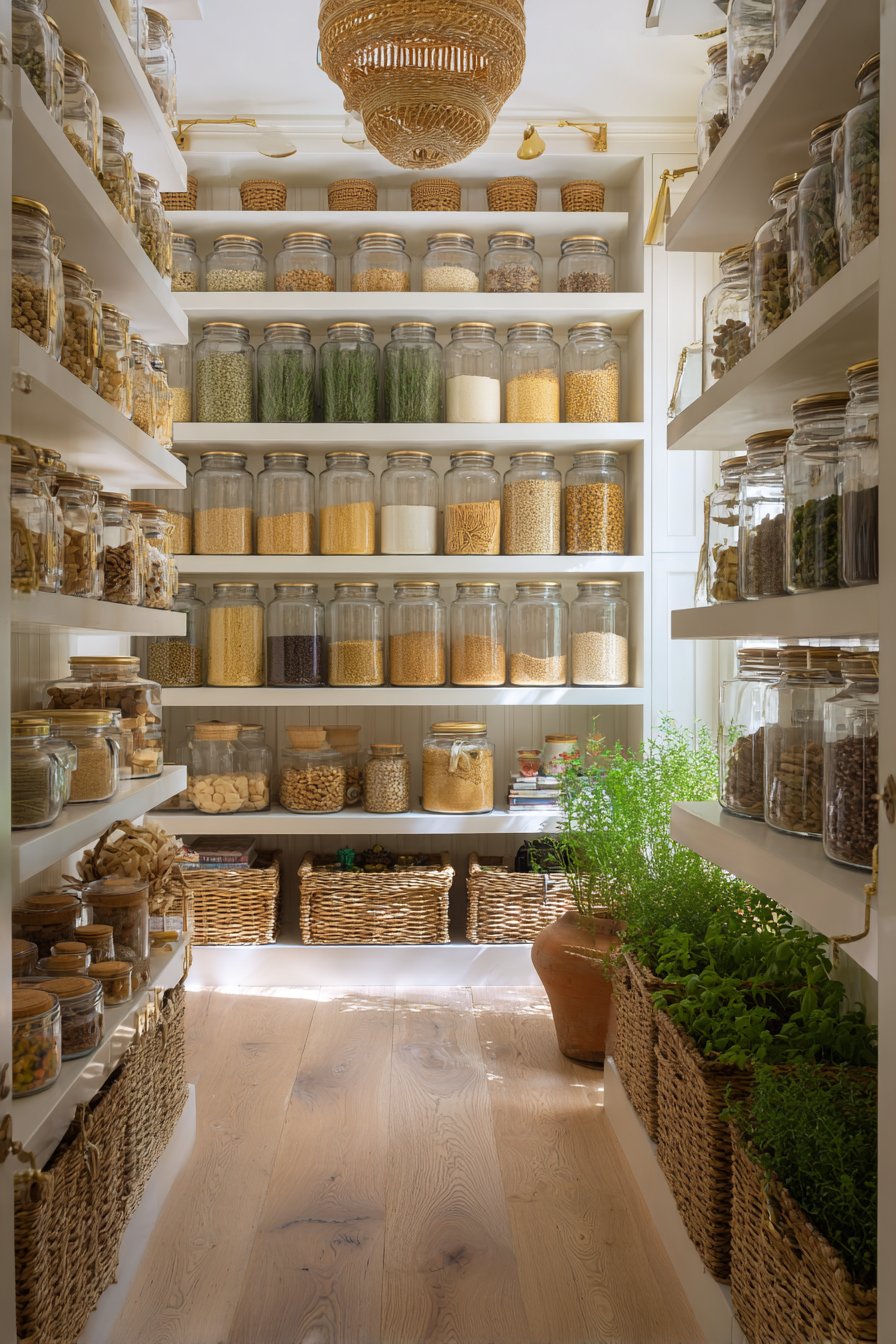
The foundation of any organized pantry starts with quality shelving that maximizes vertical space. Adjustable shelves offer flexibility as your storage needs evolve over time. Choose materials that support heavy loads, such as wire shelving, wood, or metal systems. Durability matters when shelves must hold canned goods, appliances, and bulk items.
Wire shelving provides excellent visibility and air circulation, preventing moisture buildup around stored foods. However, smaller items may tip over on wire surfaces, requiring shelf liners. Solid wood or laminate shelves create stable surfaces for all container sizes but cost more initially. Metal shelving systems offer industrial strength and modern aesthetics that appeal to contemporary design preferences.
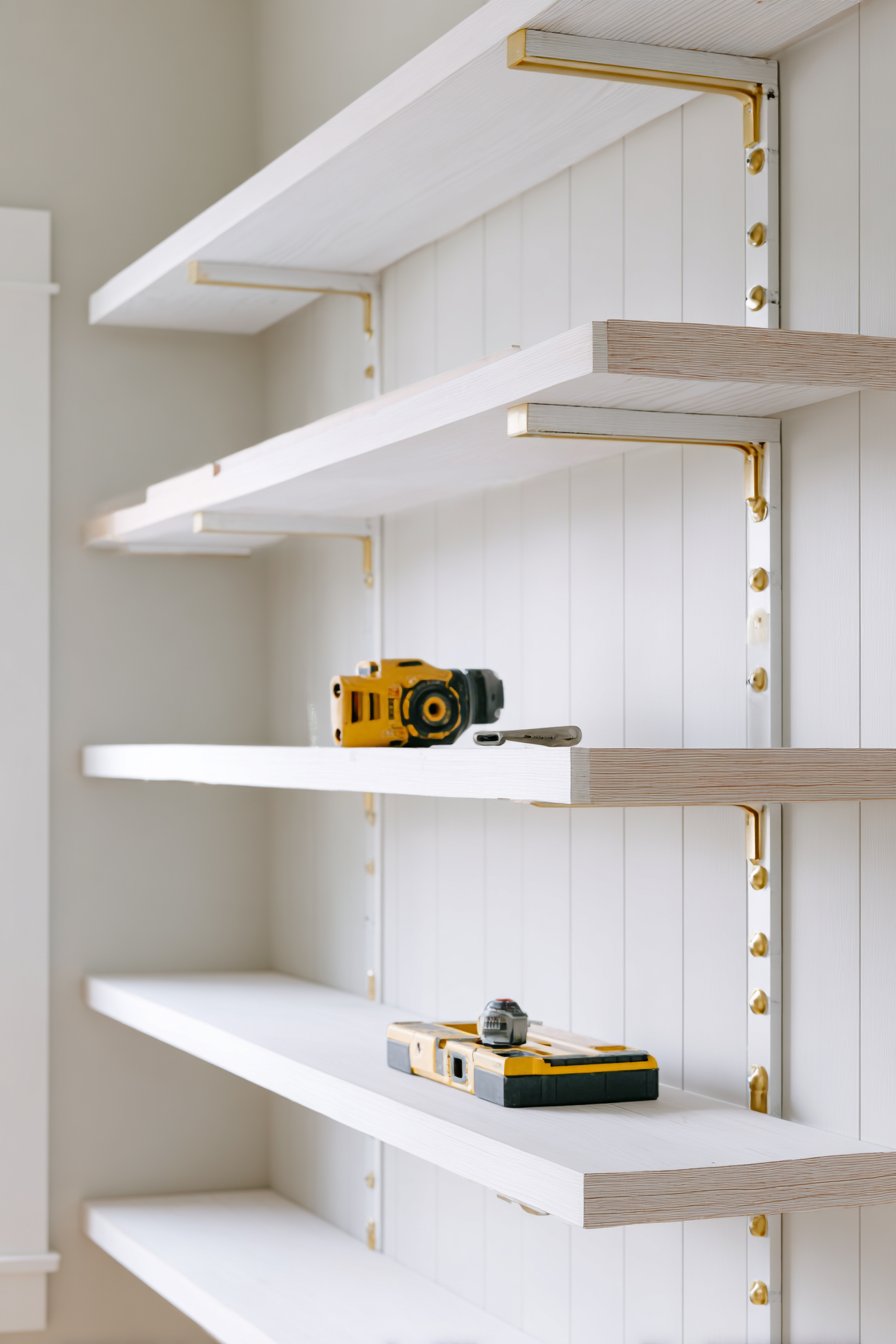
Install shelves at varying heights to accommodate different product sizes efficiently. Standard spacing between shelves often wastes valuable vertical real estate. By customizing shelf heights, you create dedicated spaces for tall cereal boxes, short canned goods, and medium-sized containers without unused gaps.
- Space lower shelves 14-16 inches apart for large items
- Set middle shelves 10-12 inches apart for standard products
- Place upper shelves 8-10 inches apart for smaller items
- Ensure bottom shelf sits at least 6 inches above floor
- Install shelves level using proper wall anchors
- Leave deepest shelves for bottom positions where bending is easier
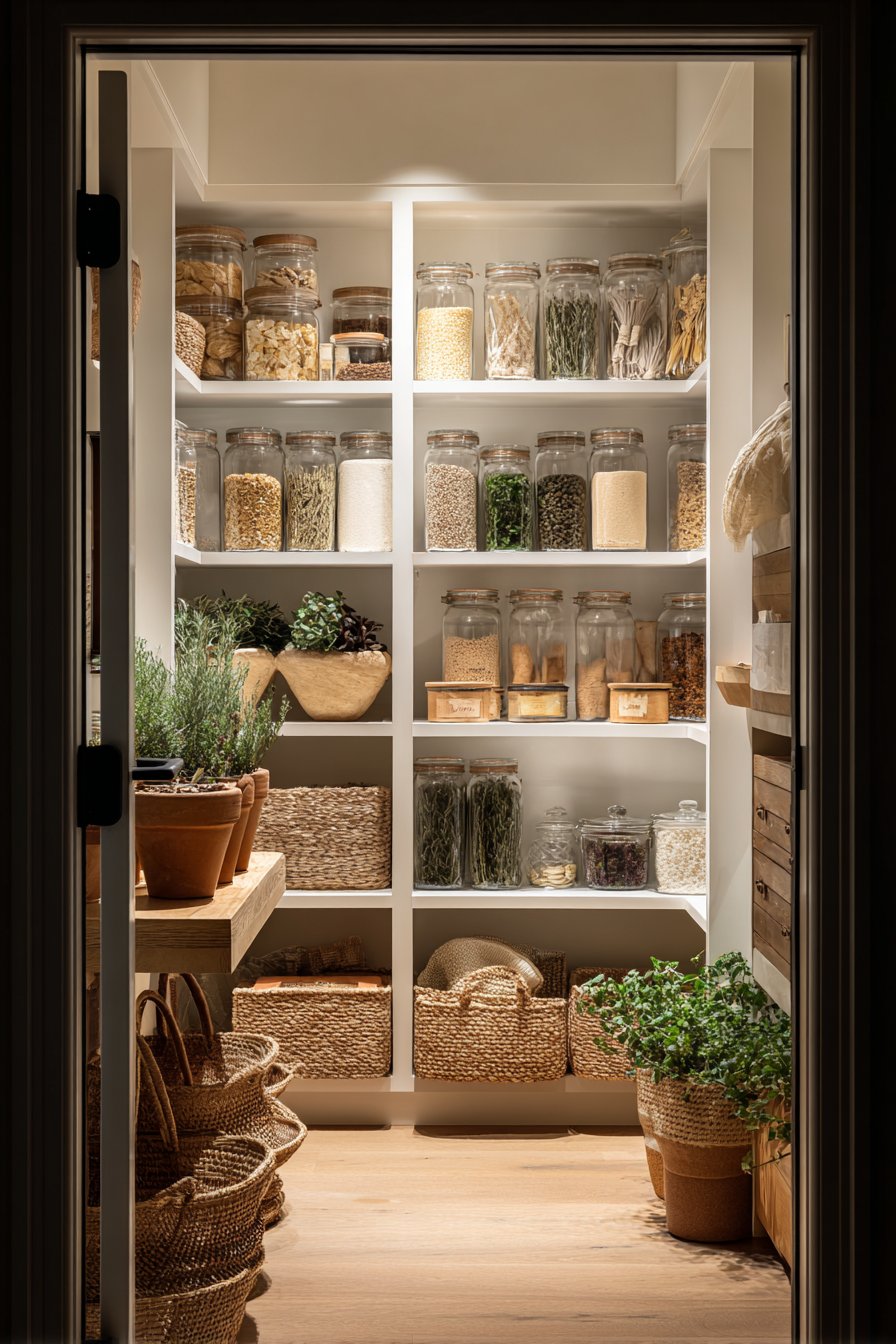
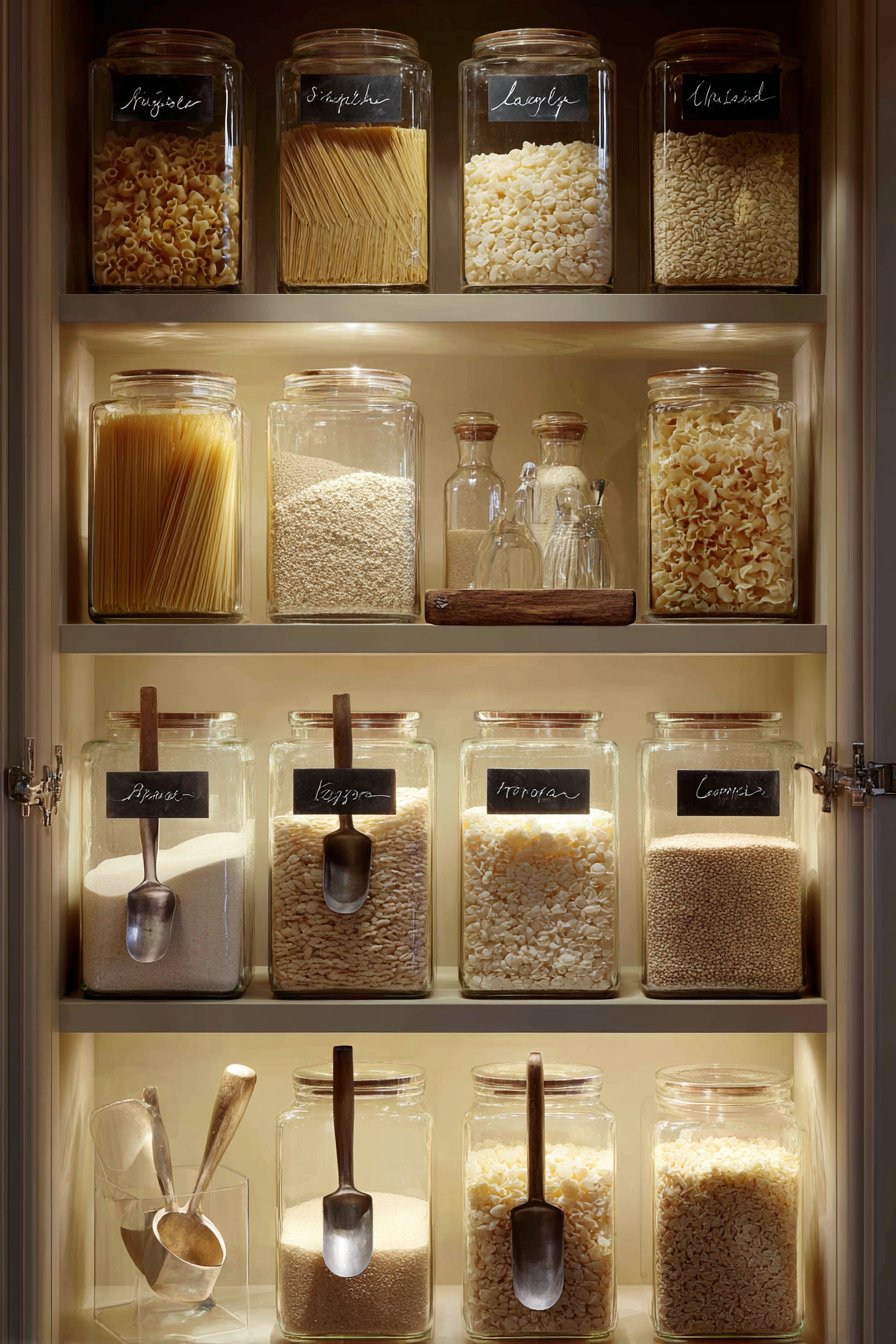
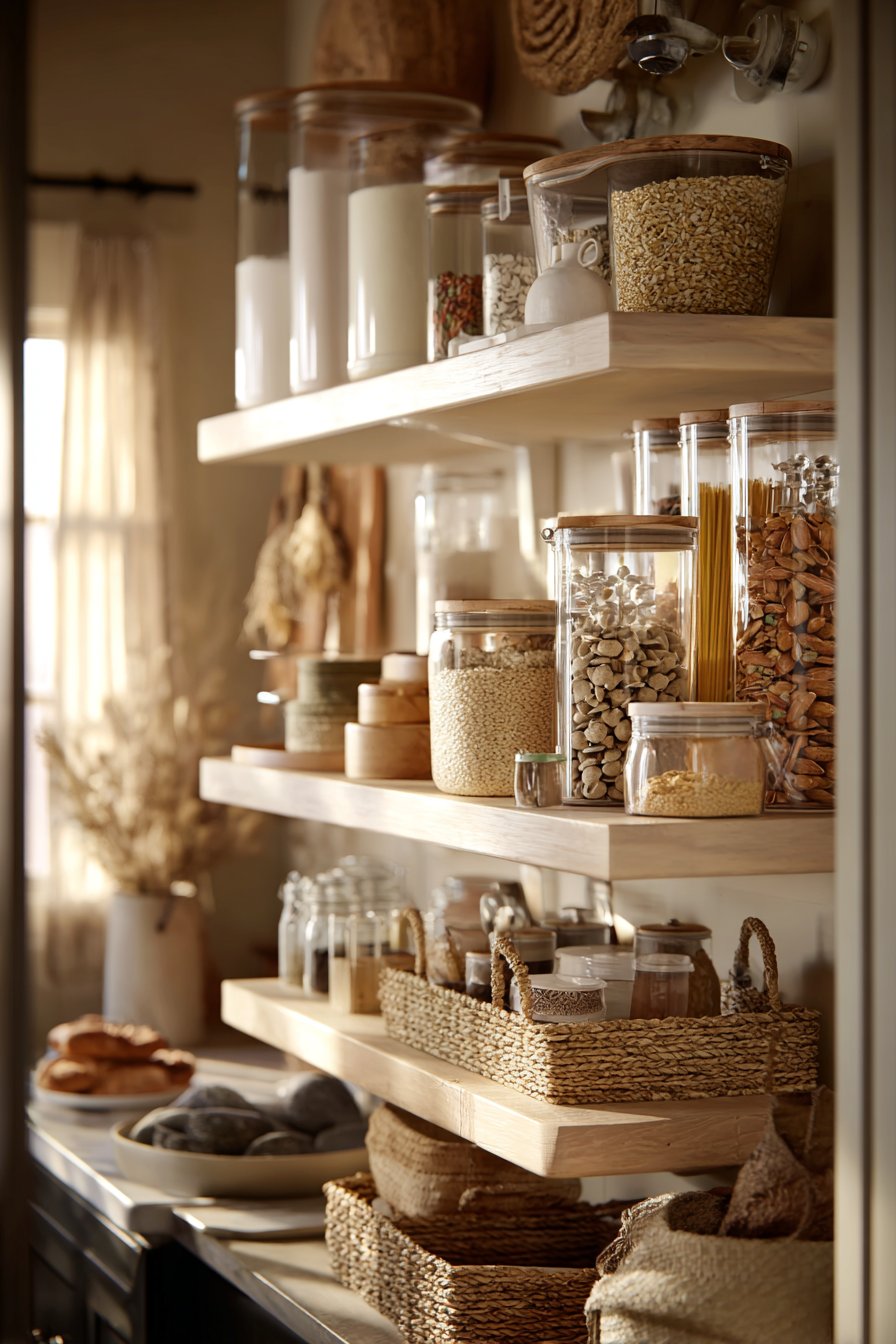
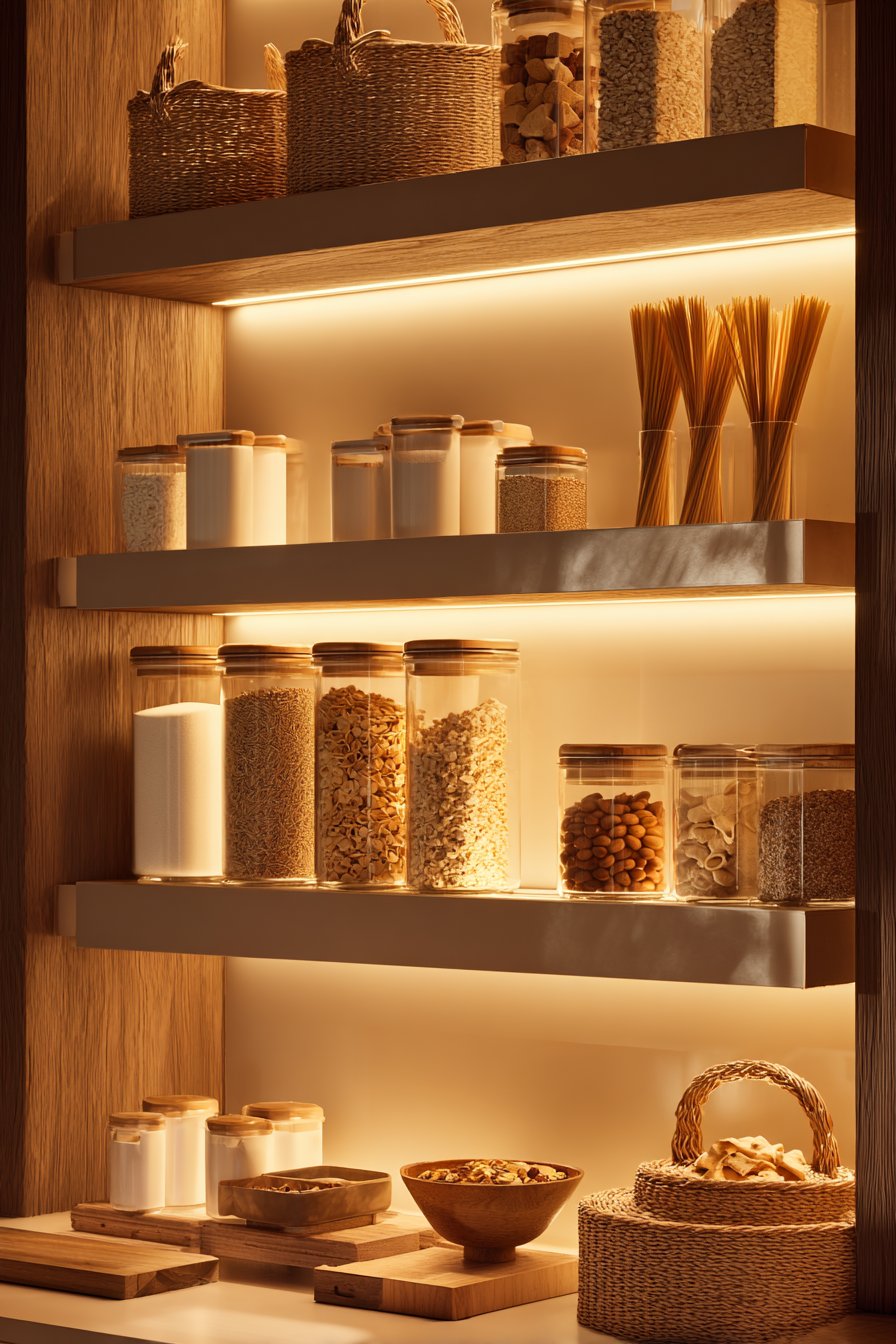
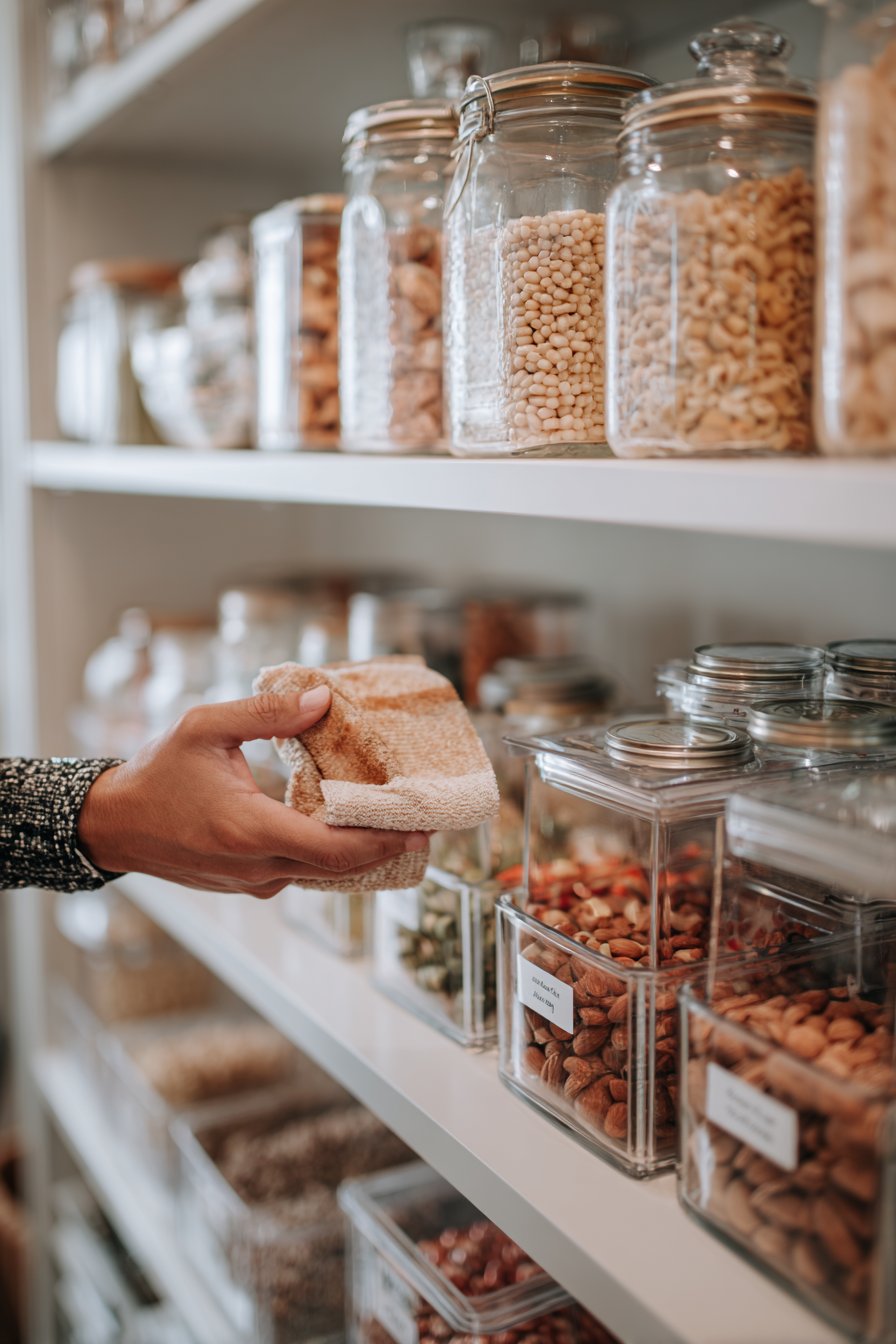
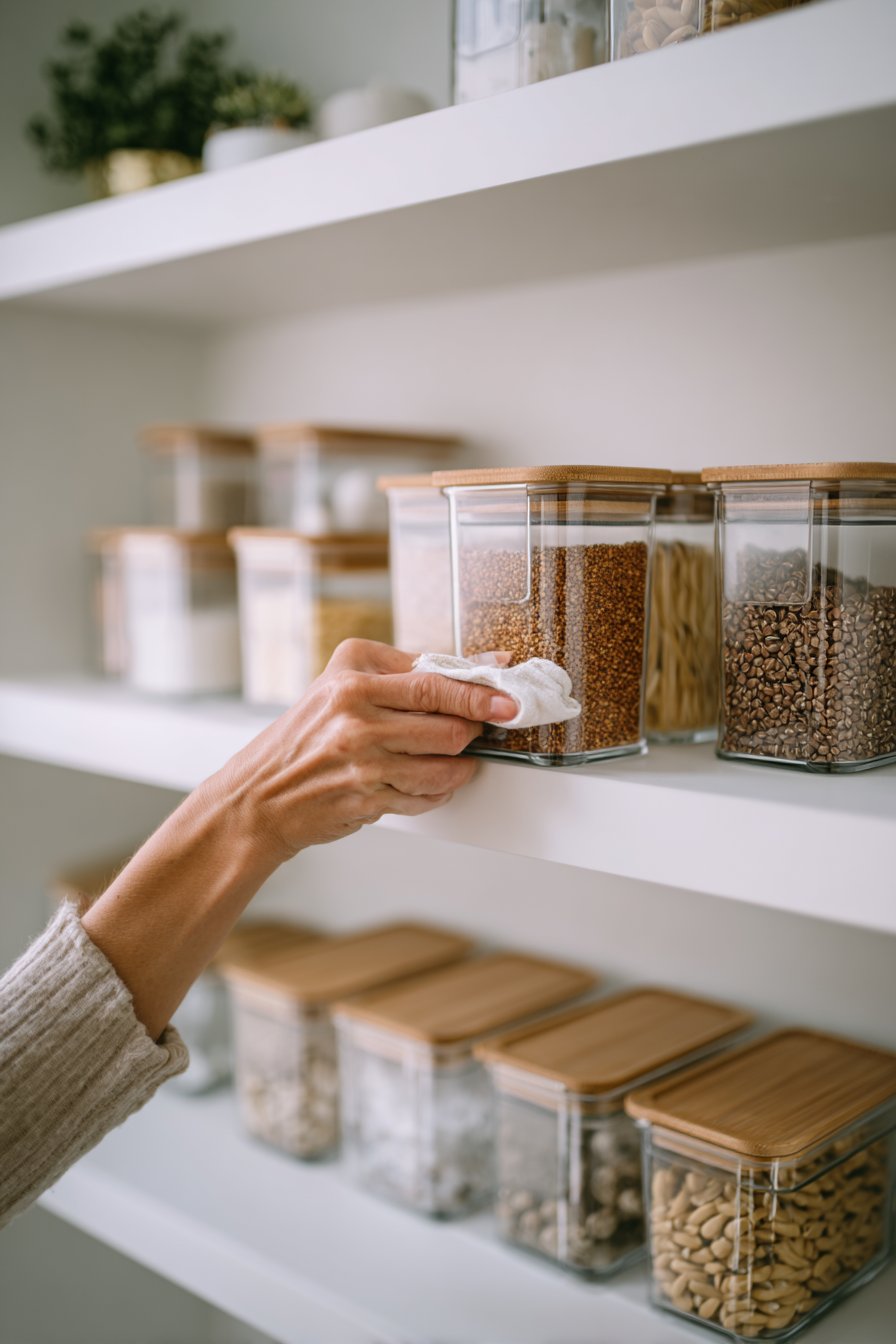
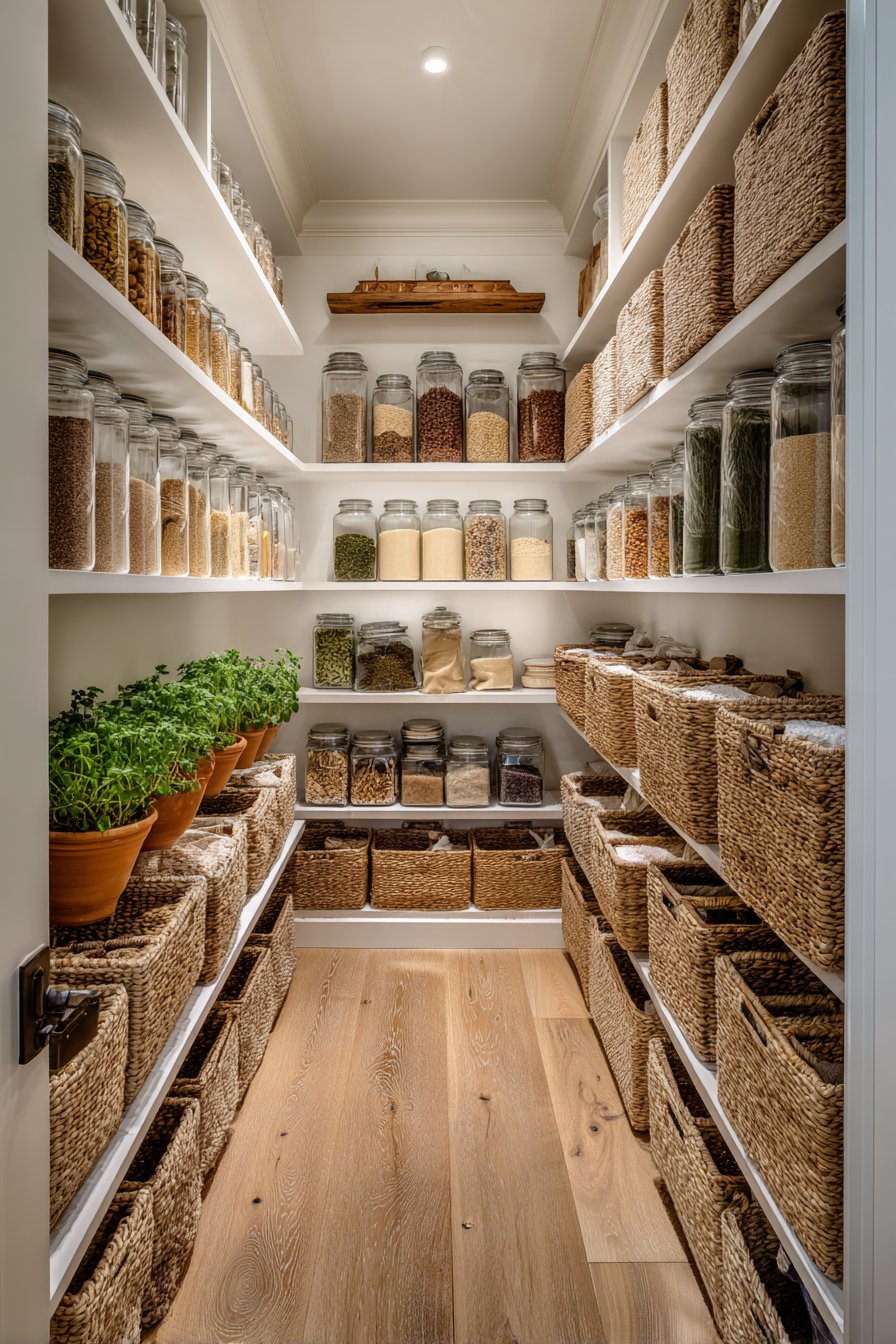
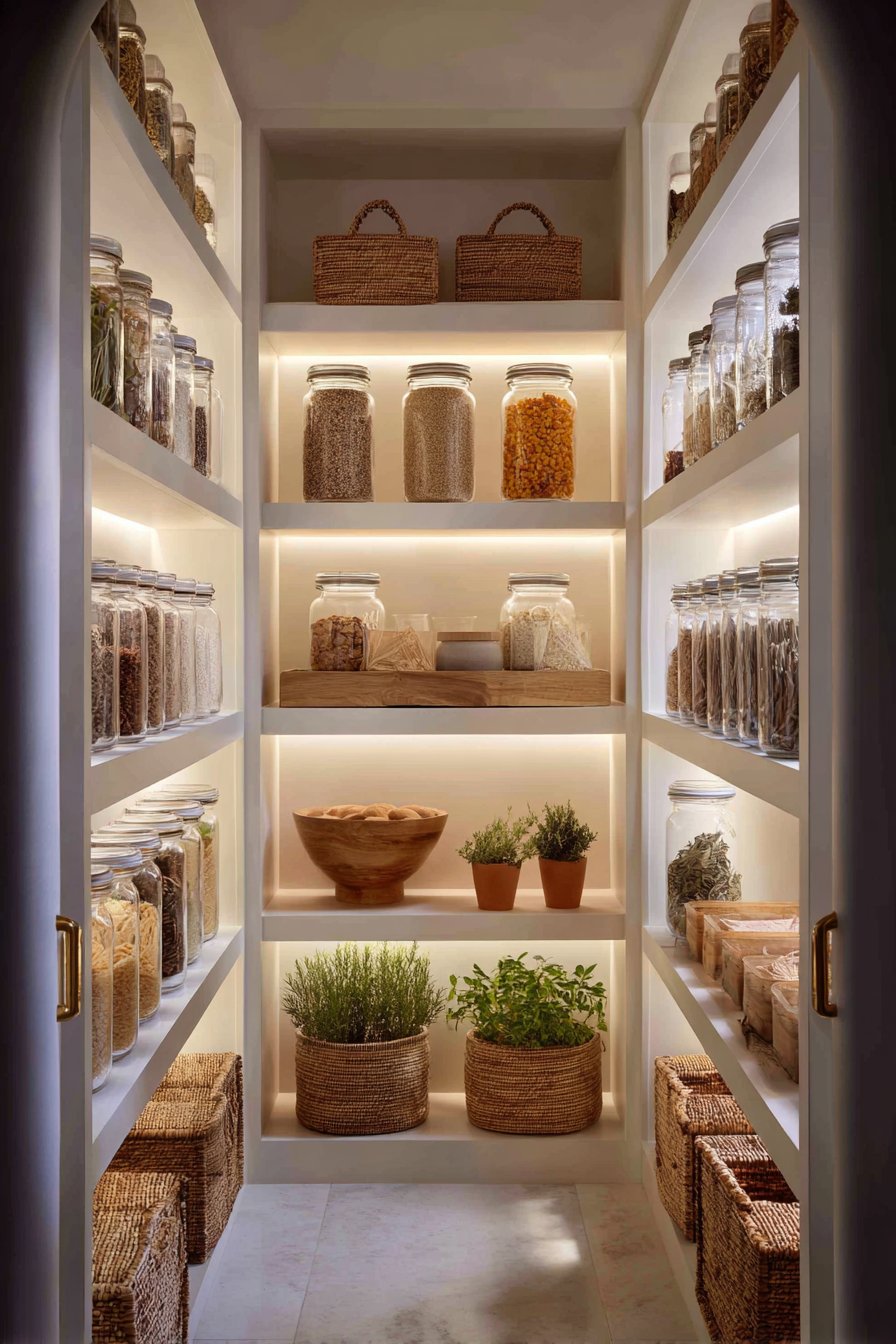
3. Implement Clear Storage Containers
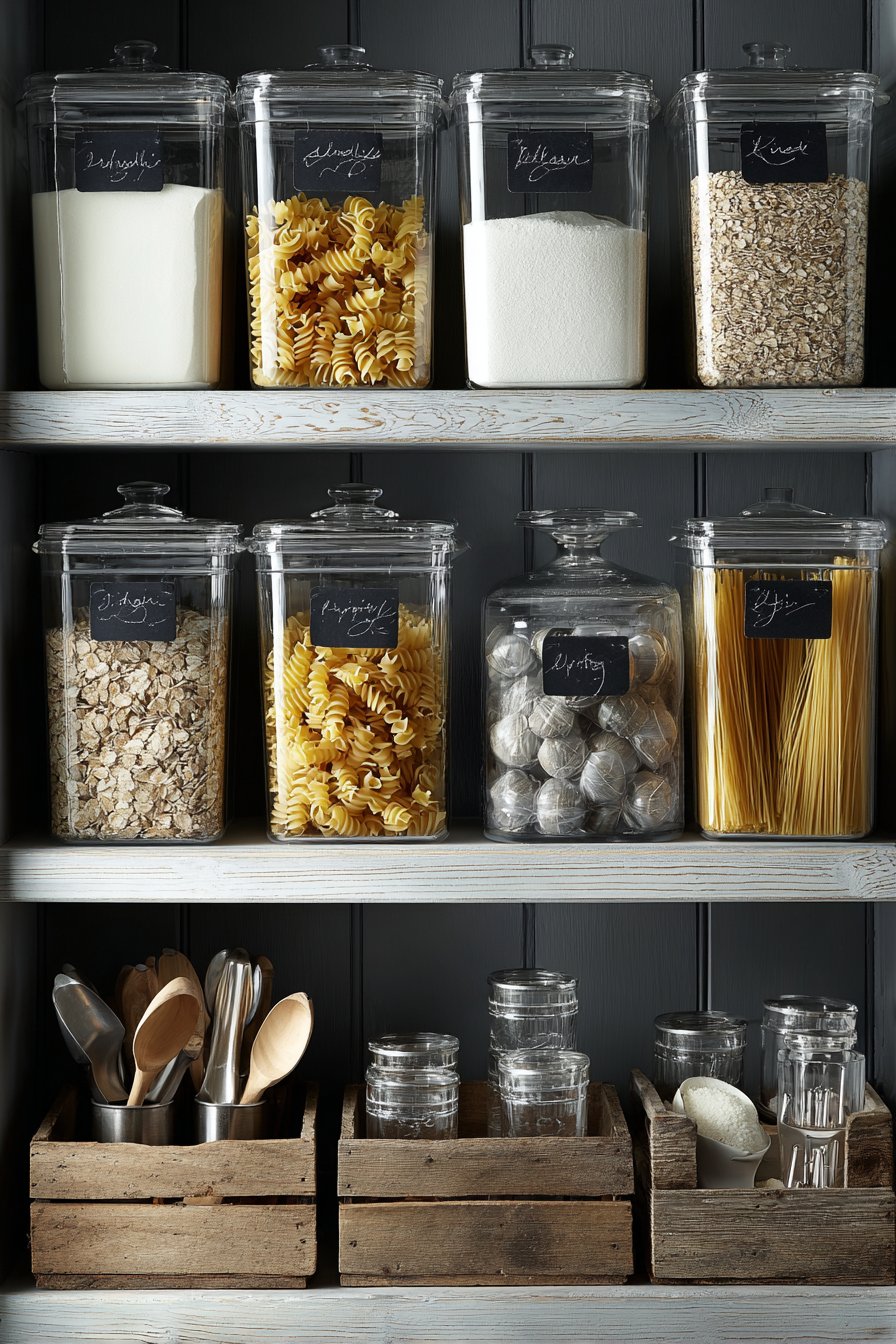
Transferring dry goods into clear, airtight containers revolutionizes pantry functionality and aesthetics. These containers protect food from pests, moisture, and staleness while creating visual harmony. Being able to see contents at a glance eliminates guessing games and prevents duplicate purchases during grocery shopping trips.
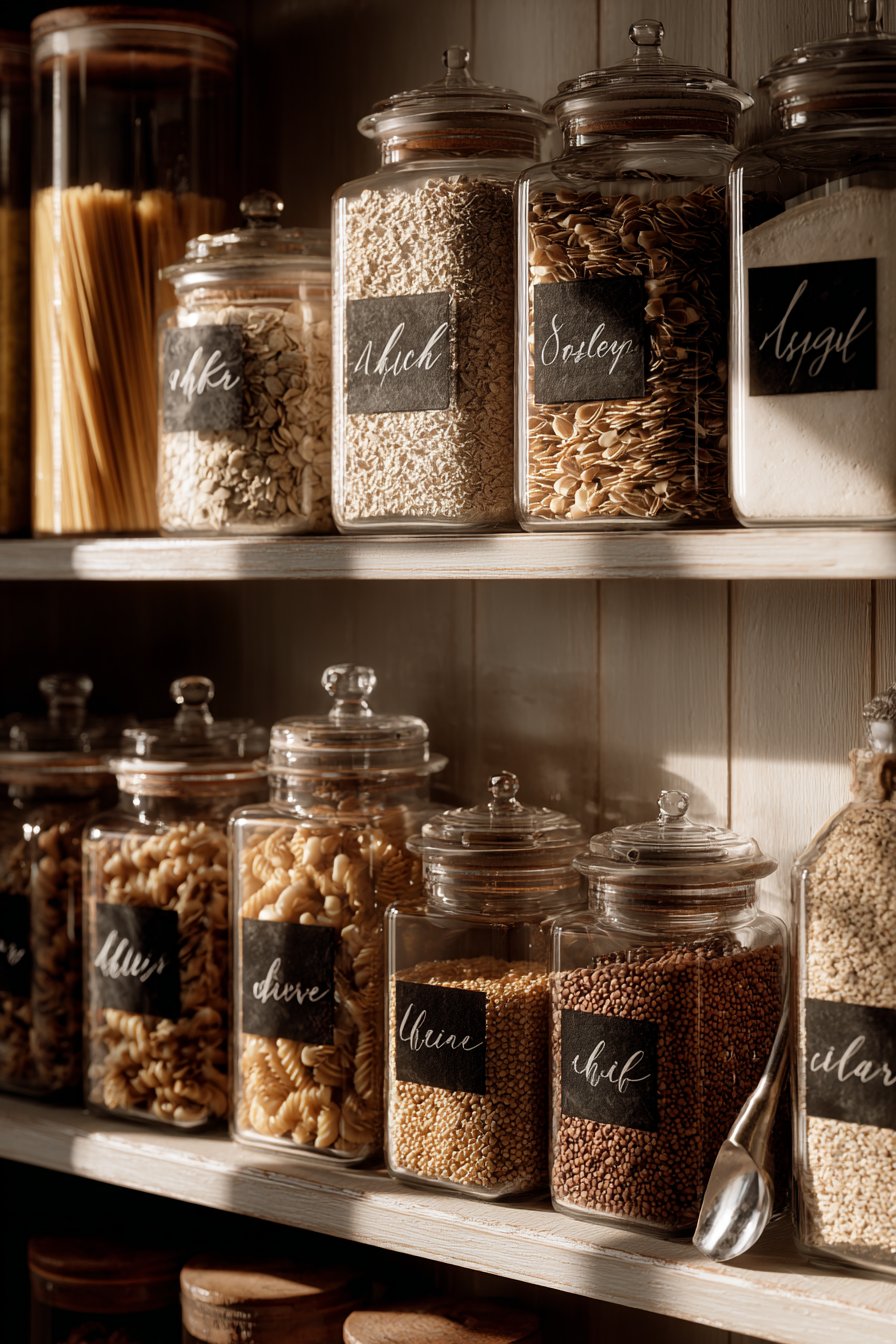
Choose containers in uniform shapes and sizes that stack efficiently and maximize shelf space. Square and rectangular containers utilize corners better than round ones, fitting more product in less area. Invest in quality containers with secure lids that seal properly, extending the shelf life of flour, sugar, pasta, and cereals significantly.
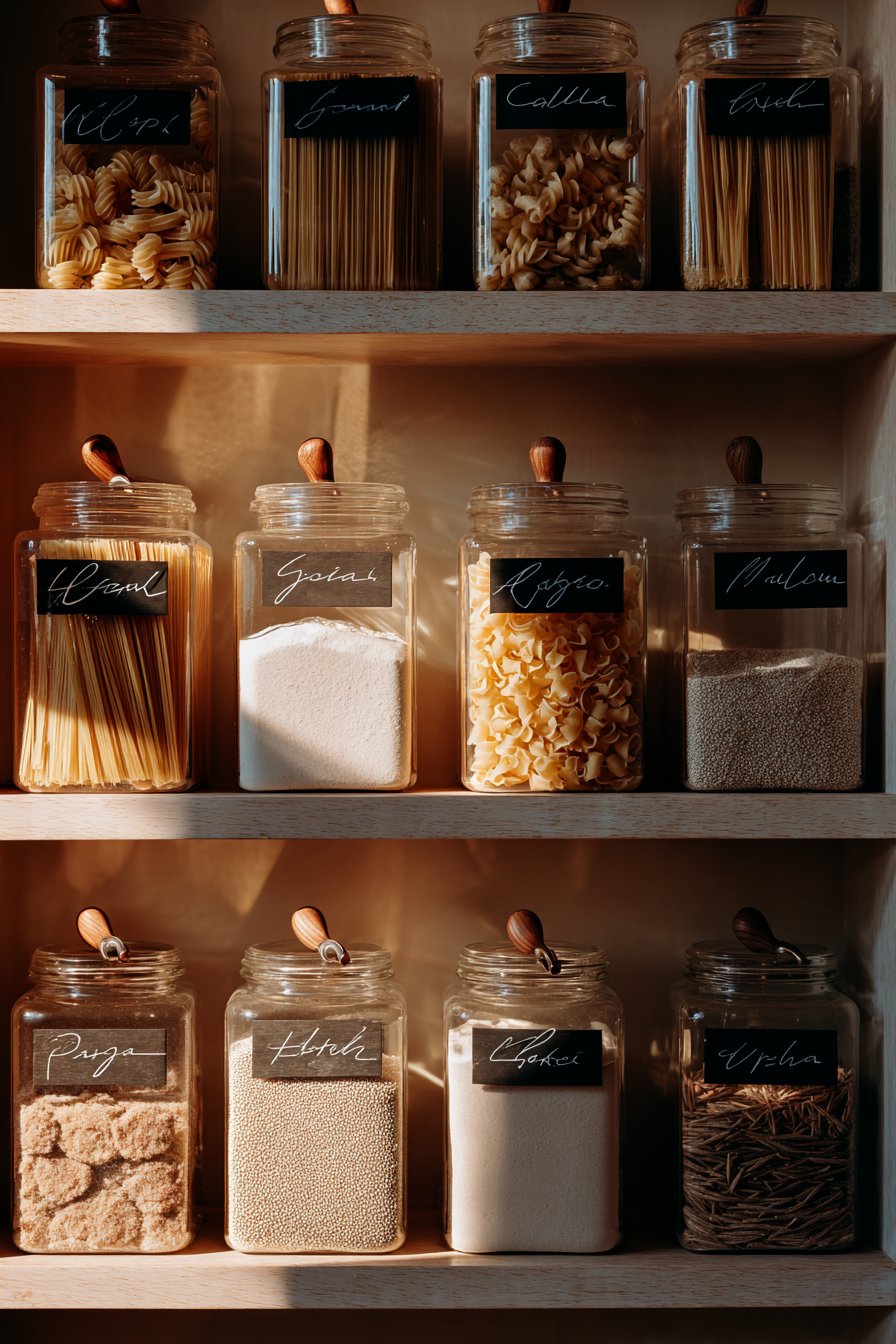
Label each container clearly with contents and expiration dates using a labeling system that’s easy to update. Consistent labeling helps family members return items to correct locations and alerts you when supplies run low. Consider waterproof labels or chalkboard labels that withstand humid pantry conditions and frequent handling.
- Select BPA-free plastic or glass containers for food safety
- Purchase containers in 2-3 standard sizes for uniformity
- Invest in containers with wide openings for easy scooping
- Choose stackable designs to utilize vertical space
- Buy extra containers for future pantry additions
- Include measuring cups or scoops inside flour and sugar containers
4. Create Functional Zones
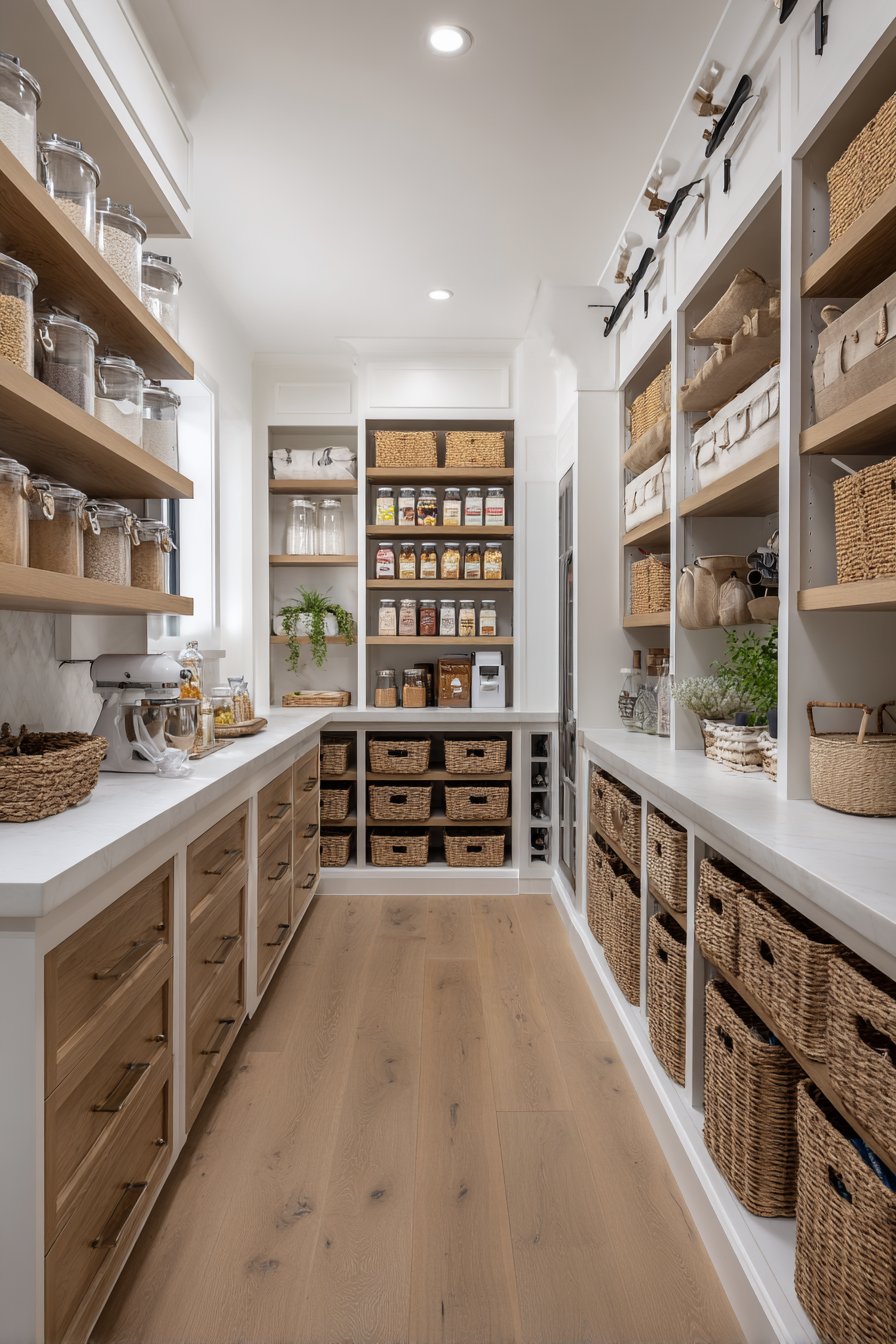
Organizing your pantry into designated zones streamlines meal preparation and grocery unpacking. Group similar items together so you know exactly where to find ingredients when cooking. This zoning strategy mirrors how professional kitchens operate, making your home cooking more efficient and less stressful.
Establish a baking zone with flour, sugar, baking powder, and decorating supplies in one area. Create a breakfast station with cereals, oatmeal, and coffee or tea. Designate a snack zone at kid-friendly heights where children can independently grab approved treats. Place frequently used items in the most accessible locations, typically between knee and eye level.
Reserve lower shelves for heavy items like bottled water, large appliances, or bulk purchases. Upper shelves work perfectly for rarely used items such as special occasion serving pieces or seasonal baking supplies. This ergonomic approach reduces strain and makes daily pantry access comfortable for all household members.
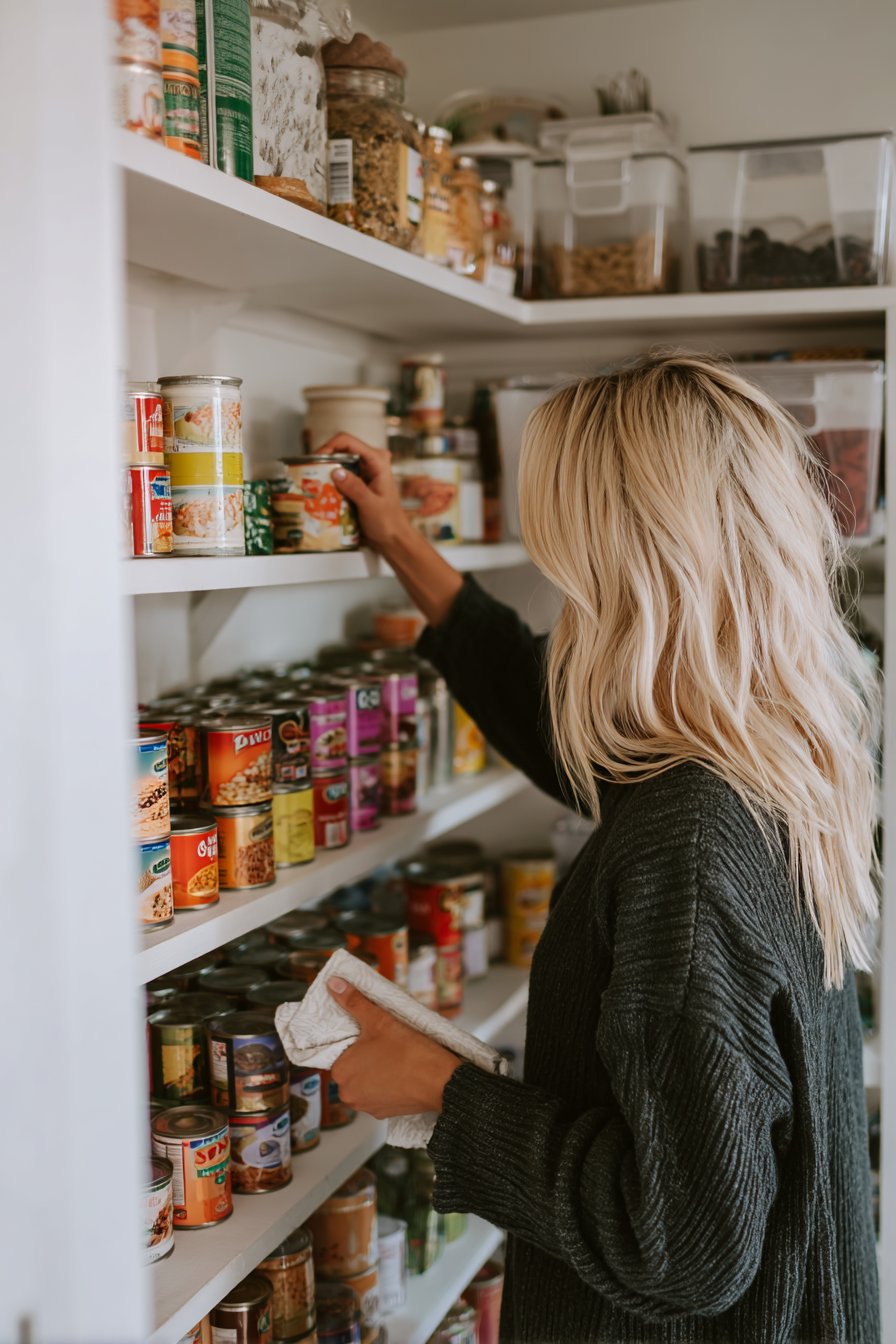
- Group canned goods by type (vegetables, soups, proteins)
- Store spices alphabetically or by cuisine type
- Keep oils, vinegars, and condiments together
- Designate one shelf exclusively for snacks and treats
- Create a meal-prep zone with grains, pasta, and sauces
- Establish a paper goods section for napkins and plates
5. Maximize Door and Wall Space
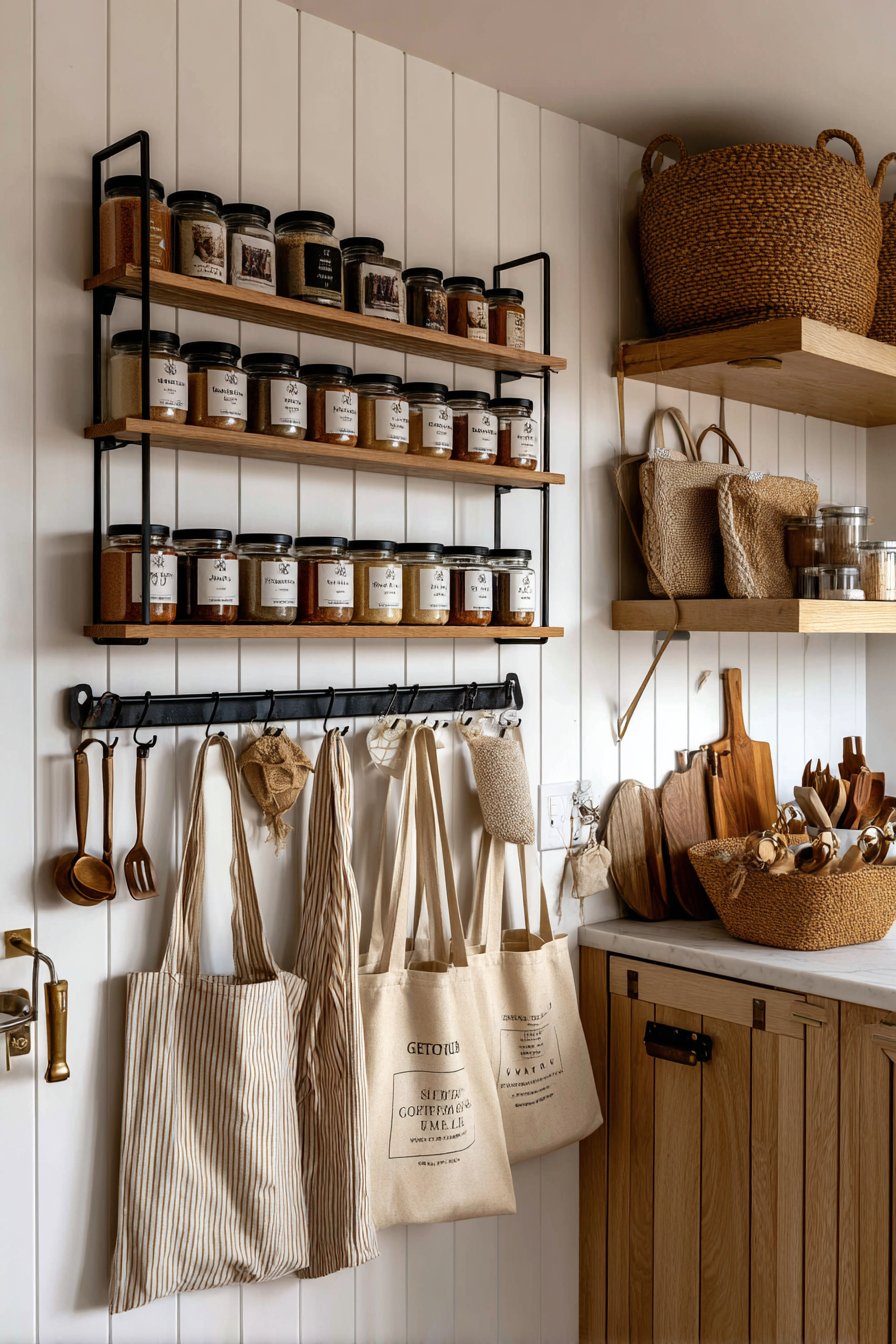
Don’t overlook the valuable storage potential hiding on your pantry door and walls. Over-the-door organizers and wall-mounted racks add significant storage capacity without consuming precious shelf space. These solutions work especially well for lightweight items that don’t require deep shelving.
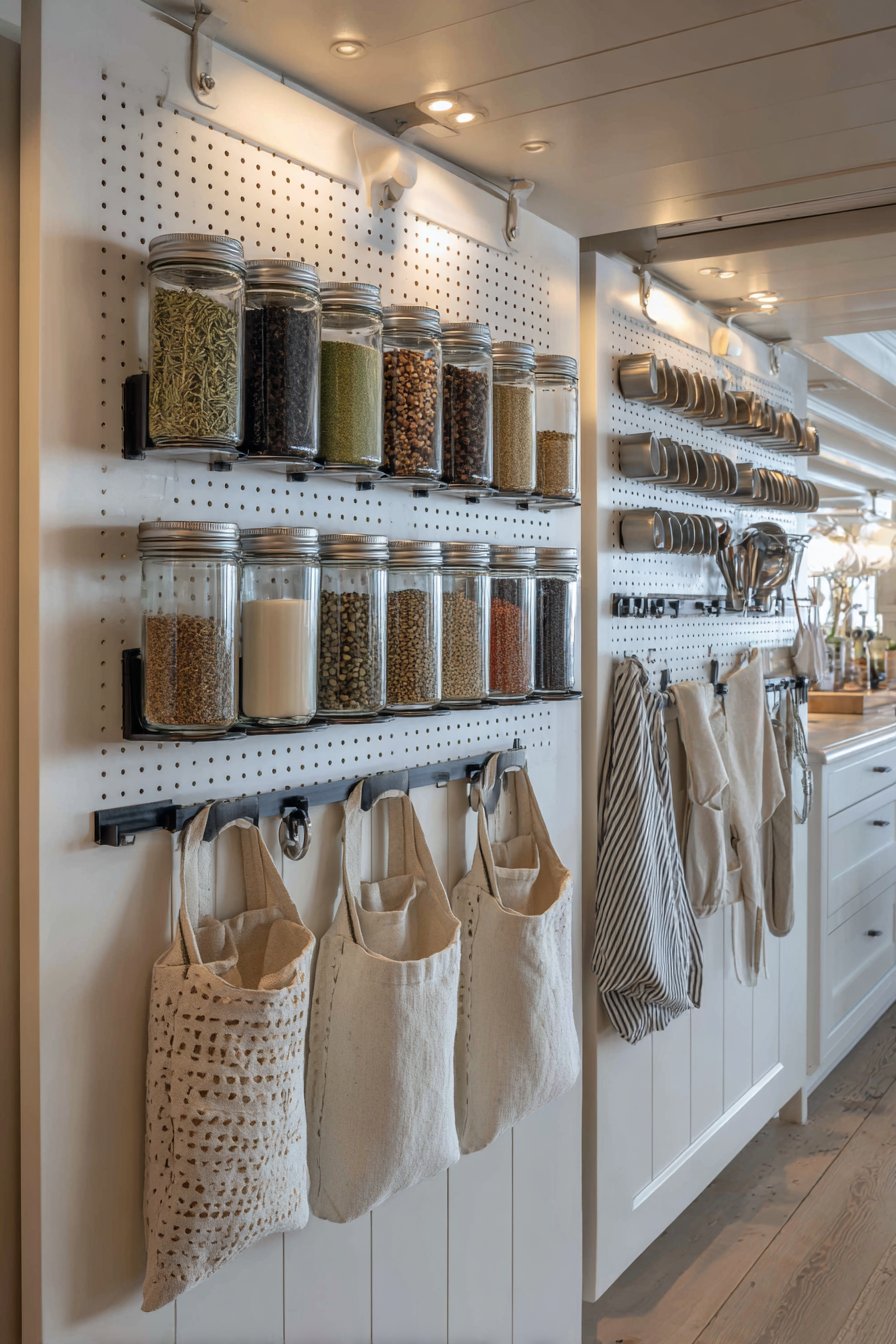
Install door racks for spices, allowing you to see your entire collection at once. This visibility eliminates forgotten jars that expire unused in the back of deep shelves. Shallow door pockets also work perfectly for seasoning packets, gravy mixes, and tea bags. The key is keeping door storage relatively light to prevent hardware failure over time.
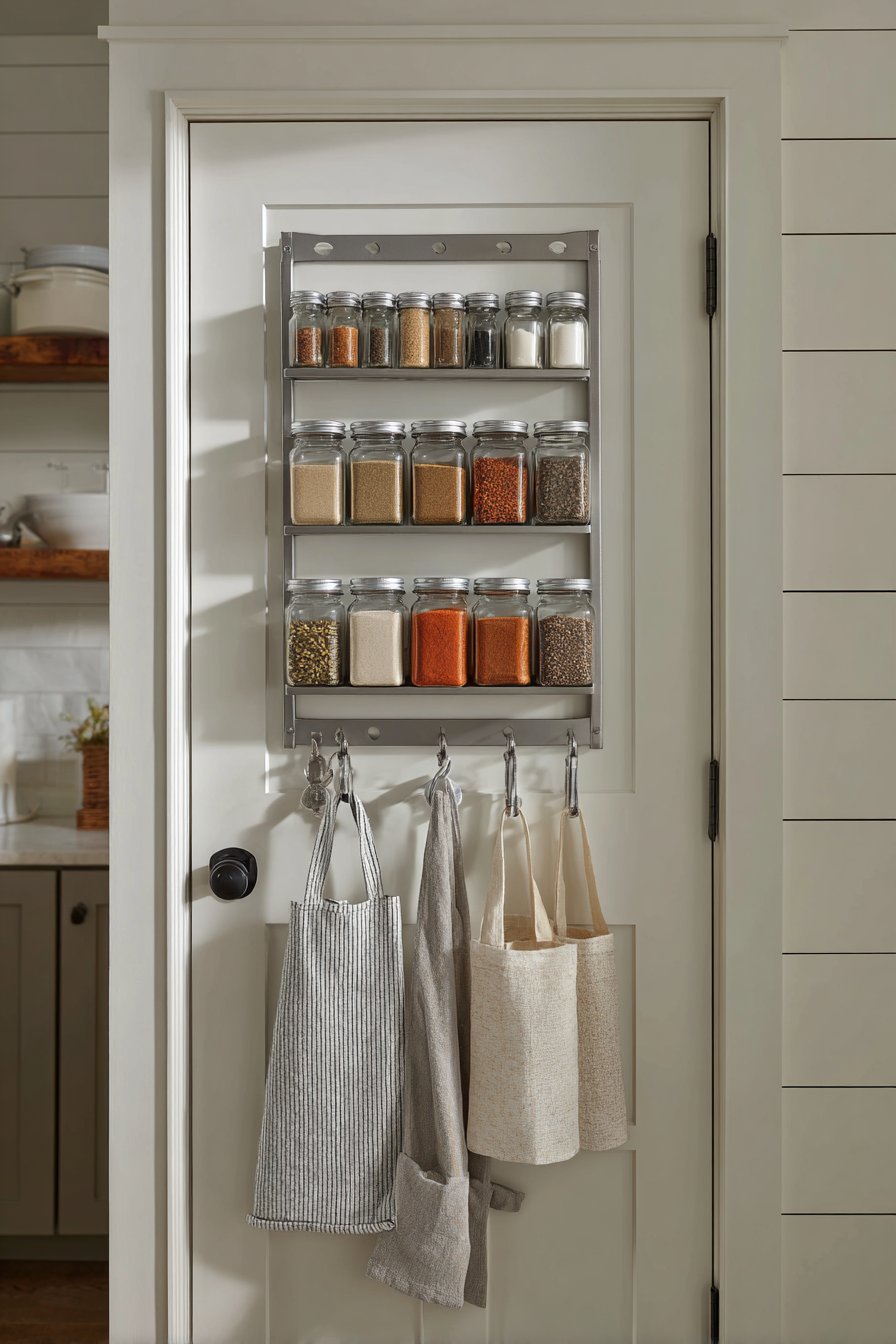
Wall-mounted baskets or pegboards create flexible storage for oddly shaped items that don’t fit well on standard shelves. Use command hooks for hanging items like reusable shopping bags, aprons, or measuring cups. This vertical approach keeps frequently grabbed items within easy reach while freeing up shelf space for bulkier products.

- Choose slim over-the-door organizers that don’t interfere with closing
- Install heavy-duty hardware to support loaded door racks
- Use wall space near the door for most-accessed items
- Mount a pegboard for customizable hanging storage
- Add hooks for reusable bags or cleaning tools
- Consider magnetic strips for metal spice tins
6. Maintain Your System with Regular Editing
Even the most perfectly organized pantry requires ongoing maintenance to remain functional and efficient. Schedule monthly reviews to check expiration dates, rotate stock, and reassess your organizational system. This proactive approach prevents clutter creep and ensures your pantry continues serving your needs effectively.
Implement a “first in, first out” rotation system where newly purchased items go behind existing stock. This simple practice reduces food waste by ensuring older products get used before they expire. During your monthly review, pull forward any items approaching expiration dates and plan meals around them.
Adjust your organizational system as your family’s needs change over time. What worked perfectly last year might need tweaking as kids grow, dietary preferences shift, or cooking habits evolve. Stay flexible and willing to reorganize zones or container arrangements that no longer serve you well.

- Set a monthly calendar reminder for pantry maintenance
- Keep a running grocery list visible in your pantry
- Wipe down shelves and containers during reviews
- Donate unexpired items you won’t use
- Replace worn labels or damaged containers promptly
- Take inventory before major grocery shopping trips
Conclusion
Creating an organized walk-in pantry from scratch requires initial effort but pays dividends daily through reduced stress and increased efficiency. By following these systematic steps, you’ve established a functional space that supports your cooking lifestyle and household needs. Remember that organization is personal, so adapt these guidelines to match your specific requirements and aesthetic preferences.
The most successful pantries evolve with their users, remaining flexible enough to accommodate changing needs while maintaining core organizational principles. Start implementing these strategies today, and you’ll soon experience the joy of opening your pantry door to a perfectly organized space. Your future self will thank you every time you effortlessly locate ingredients and streamline meal preparation with confidence.